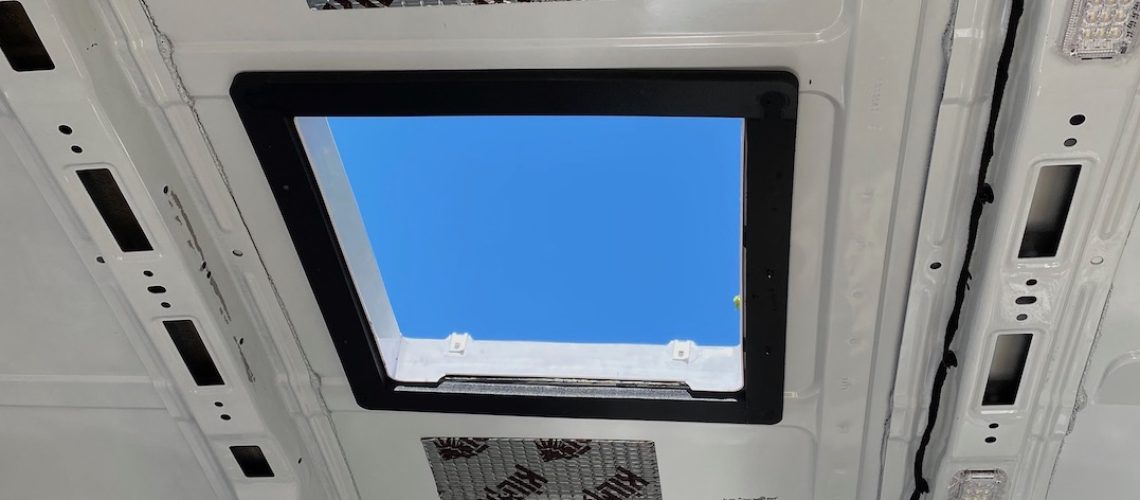
We installed a single Maxxair fan to pull air through the van. The fan draws air from a window installed on the drivers side. In our research, we found that some conversions use two fans; one to draw air into the cabin, while the other draws it out, creating an even airflow over the sleeping area. By installing a single fan, we simplified our solar panel configuration, allowing more panels to be installed. One important thing to remember is that regardless of configuration, ensure that both items (fan/fan, fan/window), can move roughly the same volume of air.
Maxxair Fan
Throughout our build, we consulted the Body and Equipment Mounting Manual (BEMM) for the 2019 Ford Transit. This made sure we maintained the electrical and structural integrity of the van as we made modifications. In this case, the Roof Ventilation section of the BEMM specifies a “Roof Panel Aperture” area (between the 2nd and 3rd roof bows) that accommodates the 14″ x 14″ cutout dimensions for the fan.
In addition, we used roof vent adapters purchased from diyvan.com to account for the factory contour of the roof, which allowed for the fan to be mounted to a flat surface. We’ve seen instructional videos on Youtube where the fan is installed directly to the roof and shims are used to fill the space created but the contour. Even though the adapters are a bit pricey, we decided they were a more elegant solution to the problem and they prevent the distortion of the roof sheet metal.
Tips:
Use a couple of clamps to hold everything in place as you adhere the adapters to the interior/exterior of the roof and pre-drill the mounting holes
When cutting the hole for the fan:
- Use painters tape to provide a line to guide the cut and protect the paint from the jigsaw
- Tape the empty Maxxair fan box underneath the installation site to catch all the metal cuttings from the jigsaw
Installation Steps:
Using painter's tape, mask a hole 14" x 14" centered between the 2nd and 3rd roof bows
Tape empty Maxxair box underneath the masked hole
Drill two holes inside the marked dimensions (one in one corner, and the second in the opposite corner)
Using the jigsaw, cut from the drilled holes to each respective corner
File down all the edges, then apply isopropyl alcohol, automotive rust protectant, and clear coat to each edge
Mount Butyl Tape to the bottom of the Roof Receiving Flange
Apply 3M Window Weld to the top of the interior Vent Adapter
Center interior Vent Adapter to the hole in the roof (inside of the van)
Apply 3M Window Weld to the bottom of the exterior Vent Adapter
Center exterior Vent Adapter to the hole in the roof (outside of the van)
Center Roof Receiving Flange on the Vent Adapter
Clamp entire assembly to together to hold it in place
Pre-drill the holes in the Roof Receiving Flange
Fasten Roof Receiving Flange to the roof with screws provided
Apply Decor Self-Leveling Lap sealant over the screw heads and around the edge of the roof flange
Open the fan completely and mount it to the roof flange using the supplied screws
Rough in the wiring from the Maxxair fan to the future distribution panel location
Connect the fan wiring to Maxxair fan using the WAGO 221-412 lever nuts
Notes:
Adding the trim piece to the bottom of the fan will be completed after the ceiling has been installed
Motion Window
We opted to install a single Motion bunk window on the driver’s side of the van. It seemed natural to us because our interior design has all of our electrical wiring located on the passenger’s side and we have no upper cabinets on the driver’s side.
Tips:
Pre-drill the mounting holes for mounting ring before final installation and manually tighten the screws so they don't strip out
Installation Steps:
Use the trim ring to determine the desired location of the window
Drill pilot holes at the end of each arc of the corners
Apply painter's tape to define the guiding line for your straight cuts
Apply painter's tape at each corner
Use trim ring to determine the correct radius for each corner and mark it with a sharpie
Using the jigsaw, cut out the hole using the appropriate blade
File down all the edges, then apply isopropyl alcohol, automotive rust protectant, and clear coat to each edge
Install window using the manufacturer's installation instructions
