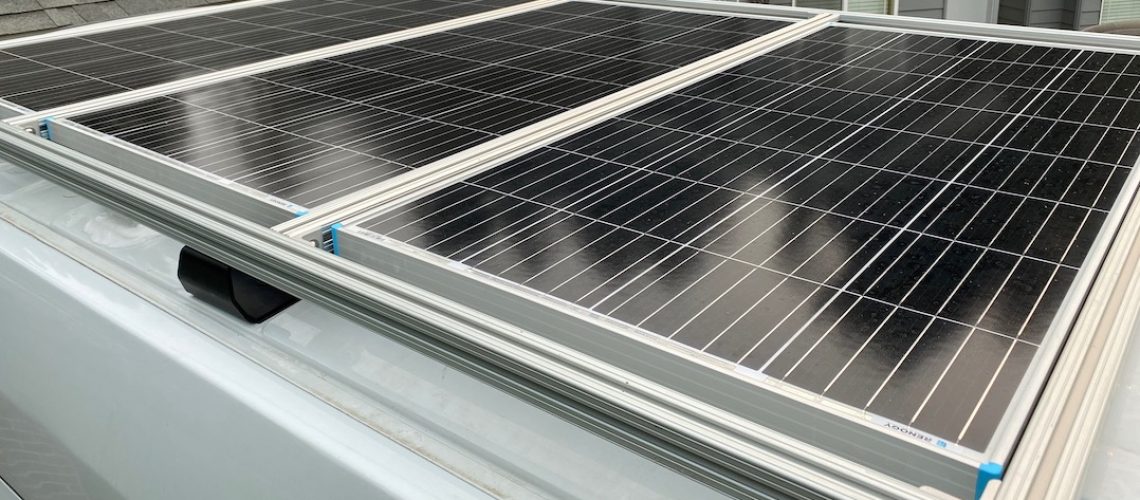
The Ford Transit has pre-built mounting points above each of the pillars, so all you have to do is remove the rubber boot covering each mounting hole before mounting your solar panel brackets. For the brackets, we again turned to diyvan.com and purchased their Rail Mounting Brackets (V2). They looked professionally made, were low profile, and honestly, were better than anything we could have designed. They also include all the mounting hardware and pad that is bonded to the roof at the mounting point. The railing pad negates the risk of incoming water and raises the bracket so there’s a 3/8″ gap between the roof and the 80/20 framing. The brackets also spaced 57″ apart when measuring from one side of the van to the other, which fit our 52″ panels perfectly.
The hole mounting tabs, mount the solar panels to the 80/20 rail system. The 3 hole tabs are used on the inside when two panels are next to each other and the 2 hole tabs are used on both ends.
Our solar panels are about 26-1/2″ wide so we were able to fit 3 of them side by side, giving us 525 watts in total.
Tips:
At the factory, the rubber boots are painted with the rest of the roof, use a utility knife to score around the boot before removing to ensure you don't remove more paint than you intend
Entry Gland Installation Steps:
Locate the solar panel wire entry location
Drill the a 1" hole for the wires
File down all the edges, then apply isopropyl alcohol, automotive rust protectant, and clear coat
Install rubber grommet
Apply 3M 08609 Window Weld to the bottom of the cable entry gland
Screw cable entry gland into place using sheet metal screws
Cover screws with self-leveling lap sealant
Rail Bracket Installation Steps:
Locate the factory mounting points
Use a utility knife to trim the paint around the factory rubber boot in each mounting point
Remove the rubber boot using a pair of needle nose pliers
Wipe the area down with isopropyl alcohol
Install the DIYVAN railing pad using 3M 08609 Window Weld and provided hardware
Solar Panel Installation Steps:
Cut the 80/20 aluminum rails to the appropriate length and file the rough edges
Build the frame according to your specifications
Mount the solar panels to the 80/20 frame using the 2 and 3 hole mounting tabs
Wire your solar panels together in either series or parallel (ours are wired in series)
Secure your wires using zip ties
Mount the 80/20 frame to the installed rail brackets using provided hardware
Push your solar panel wires through the installed cable entry gland
Tighten down the cables guides on the cable entry gland
Terminate the end of both wires for safety
Notes:
Consult Ford's Body and Equipment Mounting Manual (BEMM) to make sure you're within the max weight specifications when using the factory mounting points
Connecting the solar panel wires to the solar charge controller will be completed during the electical installation stage
